BLUF – Construct a 20 meter dipole fed with coax using a 1:1 balun
Ask a forum what kind of antenna you should use, and you’ll get as many suggestions as there are digital modes in amateur radio. Opinions are as diverse as others have had so many experiences with different setups, materials, budgets, and needs. So, I let my budget and requirements do the selection.
Like I’ve posted before, this is a hobby on a budget, and I don’t have the money to put up a tower with multi-band yagis on a rotator in the back yard. What I do have is my amateur license knowledge, a tree (yes, only one tree in my yard), ingenuity, and a little time.
Since I’m on a budget, I figured that maybe I’ll just stick with one or two bands to cut cost and complication. What’s wrong with a dipole? Absolutely *nothing*! But how do I go about making the dipole, hanging it, and getting on the air?
First, select the band. In listening through the bands, and watching for band openings, it seemed that the 20 meter band is probably the best one to get on and have some fun. The 20 meter band is from 14Mhz to 14.350Mhz. Split the difference, and you get 14.175Mhz. Use that in the handbook dipole formula (468 ÷ frequency in Mhz = full dipole length), and we end up with 33.019 feet, so let’s call it 33 feet. That means that for a 1/2 wave dipole, each side will need to be 16.5 feet.
So, what to make the dipole out of? Something cheap! I found that 16 gauge wire will probably be the best compromise of strength, weight, power handling, and cost. Speaker wire is cheap, and you only have to cut once, and you have both sides of your dipole! So, 100′ of 16 gauge speaker wire was $20. I can live with that, and will even have a lot left over for more antennas!
Cut the speaker wire at 16.5 feet, split the speaker wire into 2 separate wires, and solder on loop terminals (crimp-on, but solder to make sure it stays and weathers well).
Antenna elements covered. The only feedline I have is some Radio Shack RG58 I bought when they were going out of business, so I’m stuck with that. Now we have to make sure we don’t bring current back into the shack due to the mismatch of “balanced” dipole, and “unbalanced” coax. Balun needs is a HUGE subject, so if you want to read more, I suggest starting here:
Baluns- what they do and how they do it
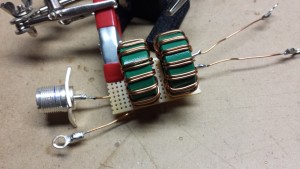
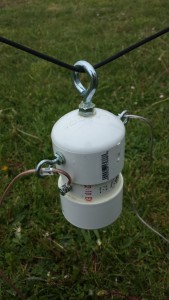
I decided to construct a 1:1 current balun using a dual core design. More on that construction in a later article, but if you want to see what I used for design, go here for the Guanella balun details. I ended up with the balun below.
OK, we’re starting to understand where we’re going, so let’s see how we’ll get this thing in the air.
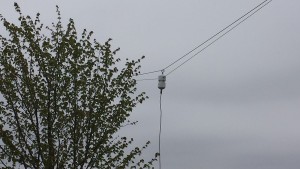
Looking around the back yard, I have one tree. That’s one point for hanging things, so I needed to make one more point. Ended up using an old basketball goal pole, and attached it to the corner of the back deck. Two points now, good to go.
I tried to think long term, ease of use, and flexibility. What I ended up with is a system using simple 550 paracord strung up between the two points with excess on the ends to allow for lowering and raising the system from either end.
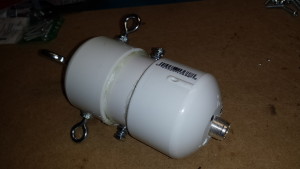
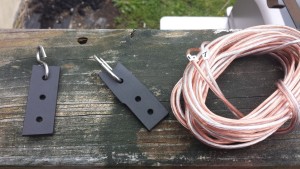
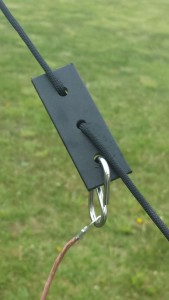
In order to hang the antenna, I decided to simply build the balun with an eye bolt to attach to the line. The antenna leads attach to the balun, and then ends of the dipole attach to some “line tensioners” I made from an old plastic spatula handle. That would allow me to slide the connection point for the antenna anywhere along the hung paracord.
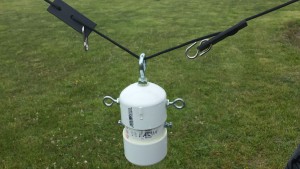
Just slide the tensioners along the paracord to wherever you need the ends of the antenna:
Closeup of balun with wires attached (17 meter dipole shown).
How’s it working? So far, so good! I’ve made contacts all the way to Romania, Italy, and South Africa on 20 meters!
It’s a simple design, and should allow me to simply switch out dipole wires for different bands. I’ve cut wires for 10, 17 (shown in pics), 20, and 40, and have made contacts on each. Changing bands takes about 7 minutes.
I haven’t checked SWR, but it should be close enough.
73

